
How Kurinuki Try-On Camera works
This app erases the clothing from a photo, leaving a transparent hole, so you can look through it at a different garment. There are two ways to try it, chosen on the home screen. Both keep all photo editing on your device. See the home page for an overview.

On this page
① Try it in a shop (the basic way)
Erase the clothing from a photo of yourself ahead of time, then hold your phone up to whatever catches your eye in the shop. You can do the prep at home.
- Pick a photo of yourselfChoose one where your full body or upper body is clearly visible.
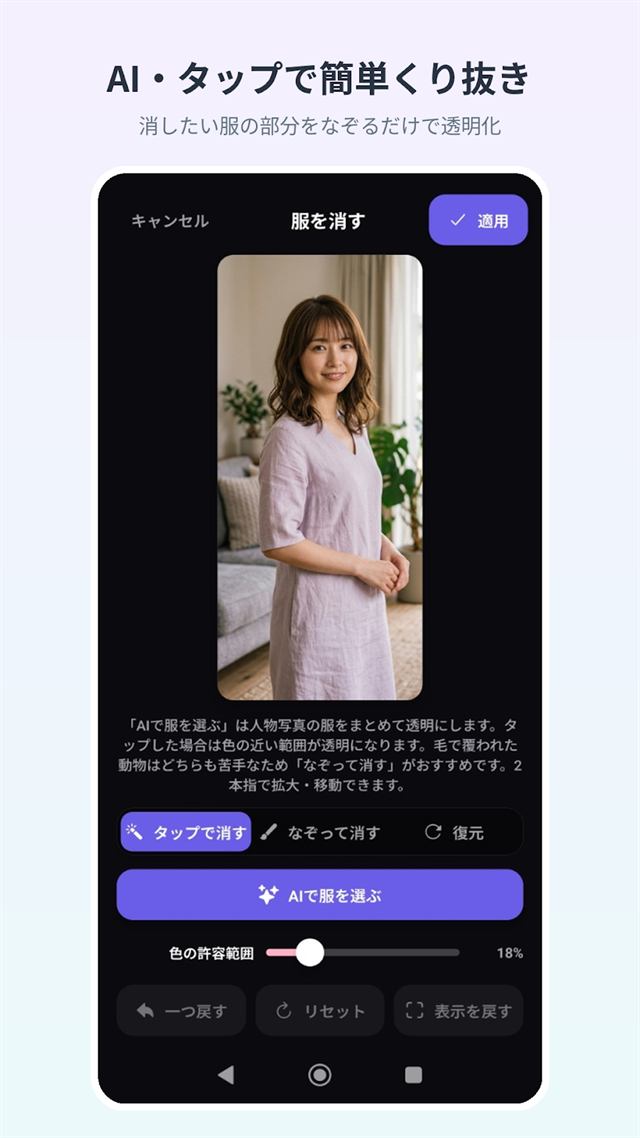
- Erase the clothesPress "Auto-select the clothes", or tap the clothing to erase it.
- Press "Apply"The cutout at this point is saved on your device, so next time you can just pick it.
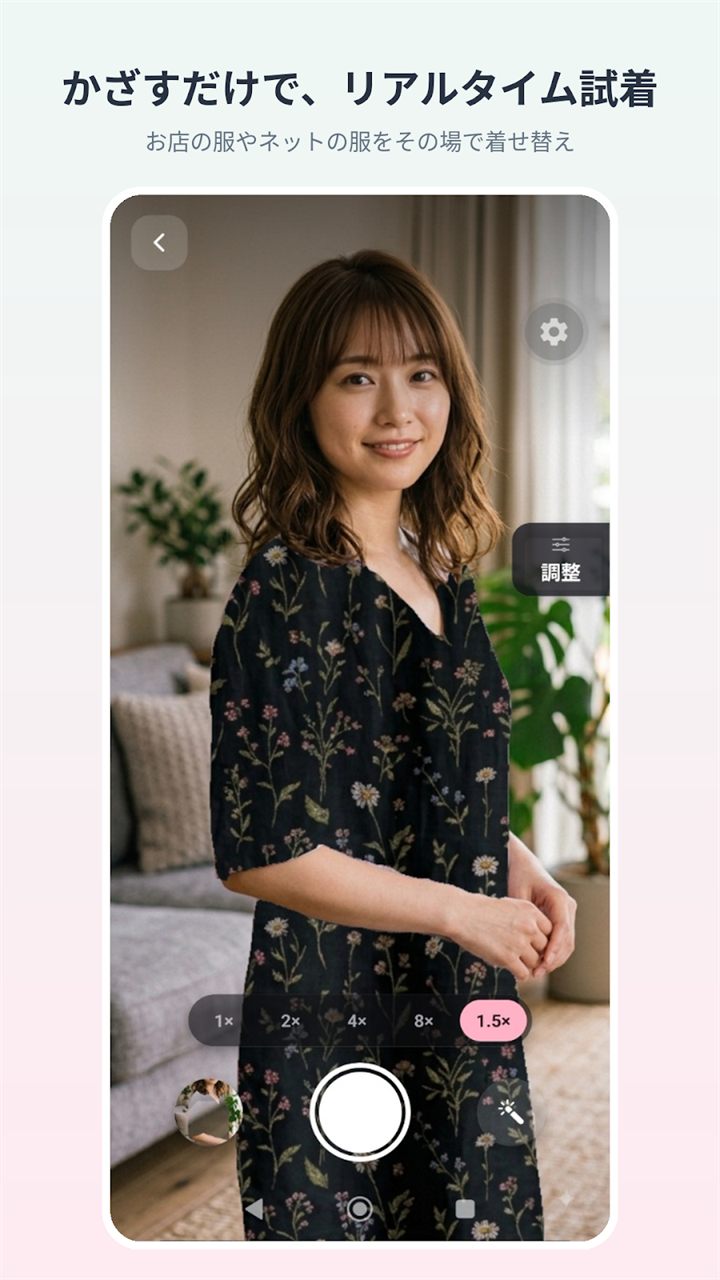
- Hold it up and shoot in the shopHold your phone up to the garment in the shop, line it up with the transparent part, and shoot.
A note (prepare at home, use in the shop)
Your cutout and its placement are saved on your device, so you can prepare at home and bring it with you. Opening the app in the shop picks up right where you left off with "Continue where you left off". "Try it in a shop" and "Try a garment online" each remember their own progress separately. The same goes for pets (Choosing clothes for pets). For what works with and without a connection, see the offline try-on app page.
② Try a garment online
Lay a garment you found on a shopping site over your own photo. This runs the opposite way from ①: you prepare the garment first.
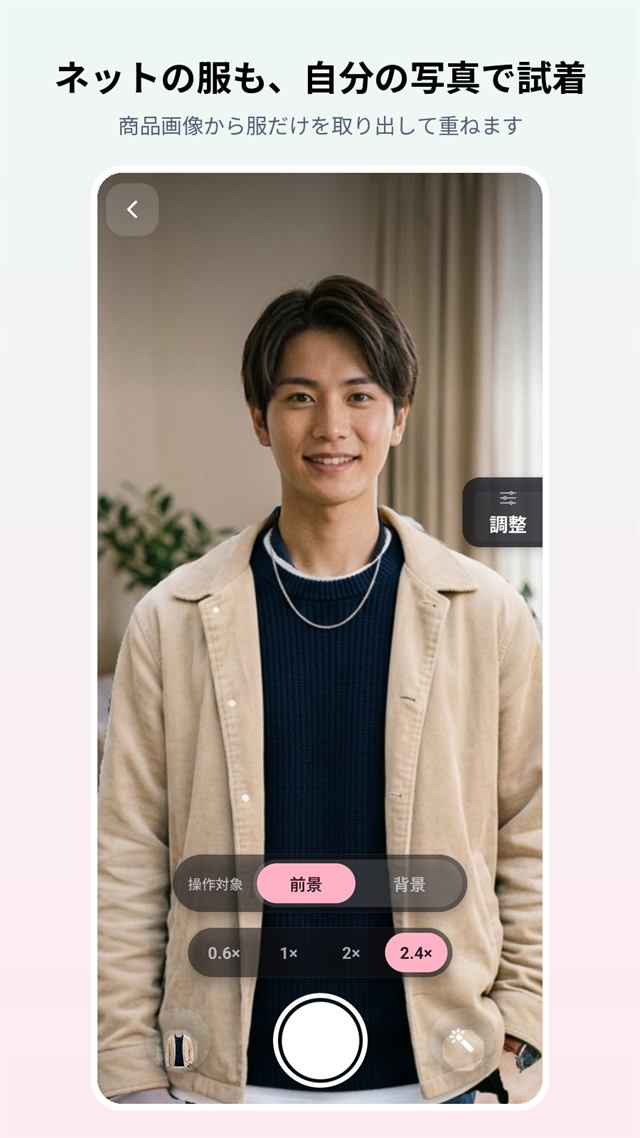
- Pick the garment image you want to tryA photo of someone actually wearing it works best.
- Erase everything but the clothesOpen the eraser, choose "Everything else", and press "Auto-select everything but the clothes". The wearer disappears, leaving just the garment.
- Press "Apply"
- Lay it over your own photo and shootPick your own photo as the backdrop, move the garment to fit, and shoot.
What works, and what doesn't
"Auto-select everything but the clothes" works best on a product photo of someone wearing the item. It can't find clothing in a photo of just the garment — folded, on a hanger, or laid flat. In those cases, tap a plain background instead, or use "Trace to erase".
Foreground and backdrop (the photo-picker screen)
This app layers two photos. The "pick a photo" screen splits those two across a pair of tabs, and the diagram under the tabs shows which one you're looking at (the lit card is the one selected).
Four tools for erasing clothes
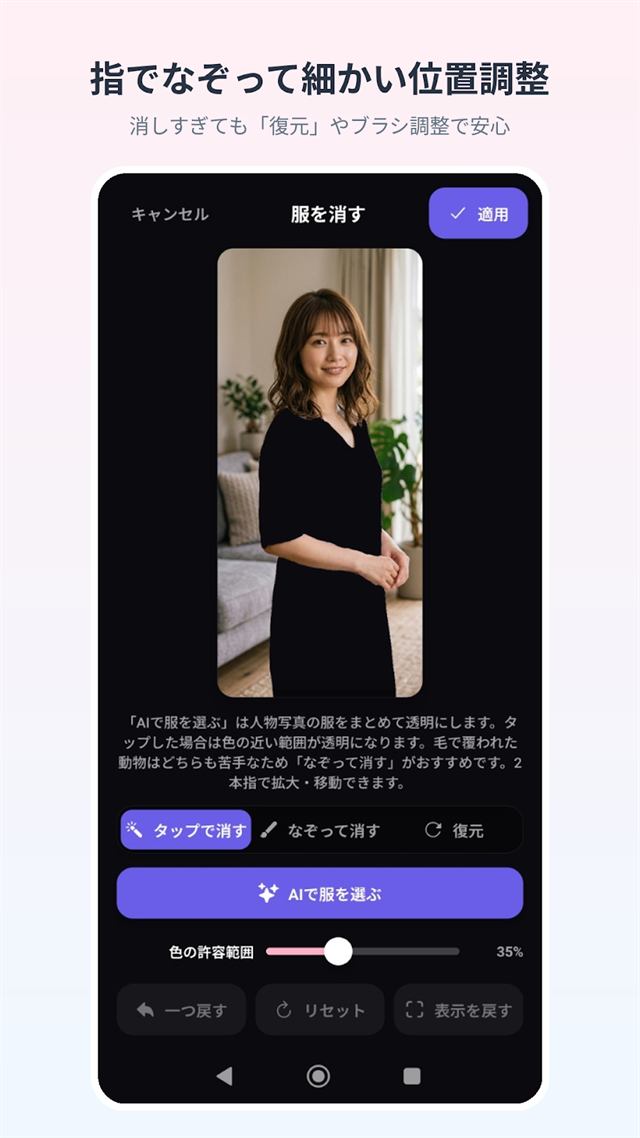
After using AI or tap-erase, you can widen or narrow what it erased with the slider below — further right erases more. No need to redo it.
AI selection limits and ads
- "Auto-select the clothes" is free, with no ads, up to three times an hour.
- Use it again after that within the same hour, and you'll be asked whether you'd like to watch a video ad. The button's own label changes to "Watch an ad to…" too, so you know before you press it.
- Even if you don't watch an ad, the free uses come back after a while. An ad can't be shown without a connection, so that use isn't available offline (though any free uses you have left still work with no connection).
- "Tap to erase" and "Trace to erase" are always free, with no ads.
- A banner ad shows on the home screen.
More on pricing is in the FAQ.
About "Apply"
- Pressing Apply saves the cutout at that point, so next time you can just pick it instead of redoing the work.
- You can keep editing right after applying, too. Undo it from the banner on the try-on screen, or "Undo apply" on the photo-picker screen, to go back to the photo before it was erased — and reopening the eraser still has "Undo" and "Restore" working normally.
- Once you close the app and pick a saved cutout back up later, though, it can't be undone. That hole is baked into the image by then, and pressing "Restore" won't change it.
Comparing several outfits
For a day of trying on a lot, these help you keep track of what you shot and compare it afterwards.
What's saved, and what isn't
- A shot is only added to your device's photo app once you press "Save" on the review screen.
- You can delete saved cutouts and backdrop photos from Settings, and the Try-on log from "Try-on log / Compare" on the home screen.
When it doesn't work well
The AI says it "couldn't find anything that looks like clothing"
It struggles with photos that have no person in them. For a flat-lay or hanger product photo, tap a plain background instead, or use "Trace to erase".
A furry animal
Fur has no clear colour edge against the clothing, so both AI and tap-erase miss. Use "Trace to erase".
The hole and the garment don't line up
Choose foreground (the cutout) or backdrop with "Target" at the bottom of the screen before moving anything — only the one you've selected responds to a drag (move) or a two-finger gesture (rotate and resize). The one currently selected is shown outlined on screen.
I want to zoom the camera
Set "Target" to "Backdrop", then pinch with two fingers to zoom the live camera (a live camera can't be moved or rotated).
The brightness is off
Open "Adjust" to change the brightness of the foreground and backdrop separately, and the cutout's opacity.
The shop's lighting makes colours look different
Set "Target" to "Backdrop" and open "Adjust". "Colour tint (cool ⇔ warm)" lays a warm or cool tint over the backdrop. It works on the live camera, too.
The garment in the backdrop is sideways or upside down
For a still backdrop, "Adjust" has "Rotate 90°" and "Mirror" to put it right.
If none of that helps, please let us know through our contact form (opens in your browser, Japanese-language). It helps to include the version shown in Settings and your device model.
A note on try-on results
What this app shows is a visual overlay — the camera feed showing through the part of your photo that's been erased. It doesn't reproduce actually wearing the item. Fit, length, colour, and texture will differ from the real thing depending on distance, angle, lighting, and the camera itself. Please confirm the real item before making a purchase decision.
See Privacy & safety for more on photo safety.
Prepare at home. Just hold it up in the shop.
For Android · Free to start